
ACMV Part 2- Trouble Areas Around Windows & Doors
START HERE TO READ THE FIRST POST IN THIS SERIES. THIS WILL HELP YOU BETTER UNDERSTAND THE DETAILS FOR EACH SECTION OF THE ACMV SERIES.
If there is one constant when it comes to ACMV (Adhered Concrete Masonry Veneer), it is that you must be sure the moisture can drain from behind the siding. This drainage is achieved by incorporating a drainage plane & weep screed (a place for the water to drain to, and path for it to escape). When you look at all of the detailed diagrams on the subject, you’ll notice that every one of them has a drainage point where the siding meets another horizontal surface. This means that every window, door, trim piece, and the ground must have a drainage point to release the water that will get behind the siding. If this detail is omitted, and it almost always is, moisture can build up and leak behind the moisture barriers that are in place. Let’s look at some pictures to see what happens when things go wrong.
MANUFACRTURED STONE WINDOW AND DOOR HEADING DETAIL
Below is a detailed diagram of what you should see when looking at ACMV manufactured stone install. Notice the weep screed at the top of the window to give the moisture a place to drain, and an expansion gap (with backer rod and sealant to keep wind-driven rain out). When that flashing is missing (and it almost always is), the water that gets behind the stone will collect and build up on top of the window (the head). I’ve added some rain drops to the image to help you better understand what happens to the moisture, and what path the water takes as the wall takes on wind-driven rain.

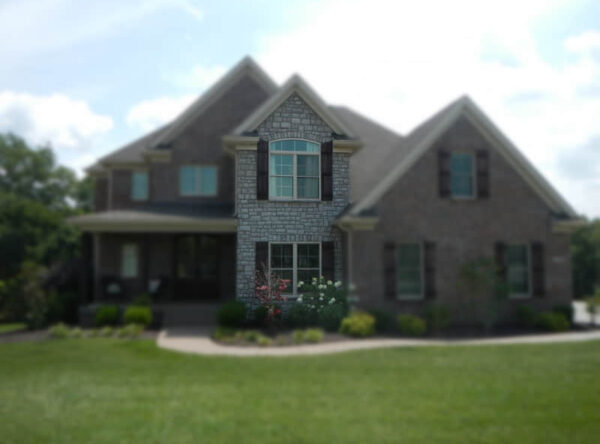
Now let’s look at a picture from an inspection of a typical ACMV install I see in Louisville during inspections. You’ll notice that the mortar was installed around the stones and it was also laid directly next to the window frame. The is no form of expansion gap, and the weep screed is missing. Every important detail was skipped.

WINDOW AND DOOR JAM DETAILS
The sides of windows call for the same backer-rod and sealant as the top, to allow for thermal movement. Remember from science class that almost everything expands and contracts when it heats up and cools down. We must allow for this movement, and flexible sealants are the best way to do so. We incorporate bond breakers like backer-rods to help cut down on the amount of sealant used, and to keep the bond in the joint even. I drew a couple of diagrams to help you visualize what the backer-rod/sealant joint would look like.

Let’s look at a detail where the backer-rod is missing from the equation. When you don’t utilize a backer-rod, the sealant will flow and move inside the joint and grab more of one side than the other. Think of this as a game of tug-of-war. One side has 10 people, one has 3 people. Who’s going to win? When one side is stronger than the other, the joint will fail and pull apart. This is what happens when you see a caulked joint that has cracked and opened up.

Here is what a typical install of ACMV around windows looks like in my area. I’ve never seen an installer use backer-rod and sealant. It’s always either mortared straight to the window jam, or “dry stacked.” Both are a recipe for failure. You know the old saying, “If you fail to plan, you plan to fail.”

WINDOW SILLS
One of the most important details with a waterproof installation of ACMV on your home should happen long before the stone veneer is ever installed. The opening for the windows must be wrapped in sill flashing. This is usually done with a peel and stick product such as Grace Vycor Flashing. If this step is omitted, compounded with the other skipped details, you will be left with water that will seep in around the corners of the window sills, and rot out the wall. How fast this happens all depends on how much water gets in.


IDENTIFYING A PROBLEM
Even though I have never seen an installation of ACMV that I would consider correct, I have seen several houses that are not showing signs of problems (to the naked eye). Sometimes it take the Perfect Storm of circumstances before real problems pop up. Sometimes it takes the right amount of rain exposure. Sometimes enough time hasn’t elapsed for a water problem to manifest itself on the surface.
When I can’t simply look at the home and know there is an issue, I use technology to help out.
Moisture Meters- I carry several different kinds of moisture meters. Each tool does one particular job well, and the specific task dictates which one I reach for. When dealing with ACMV and windows, I use my Protimeter with deep wall probes. Yes, it’s expensive, but it’s a drop in the bucket to what the repair costs on your house will be.
Your wall cavity is about 4″ thick. Most of the time, the moisture will take years and years to show up on the inside of the home near the drywall. However, using the wall probes, I’m able to take moisture readings through the 4″ of wall cavity and reach the backside of the substrate (the OSB plywood on the outside). This surface is what the ACMV is actually mounted to. If water is leaking in, the meter should find it.

As with other claddings used in construction, the details around doors and windows are what must be perfectly executed. Flat walls are relatively easy; it’s when a change shows up in the architecture that builders and contractors must follow details, or things go south in a hurry. If you’ve compared your home to what I have detailed here and you’re concerned, I encourage you to reach out to a moisture intrusion expert to have your home examined. If you are in my area, Louisville, KY, please feel free to contact me about getting your ACMV Inspection.


How would you wrap cultured stone to an inset window?
I am having problems finding this detail. I assume on the top you would use a lintel but now sure on the sides and bottom.
How far back is the window inset?