ACMV Part 3- Wall Details and Drainage
START HERE TO READ THE FIRST POST IN THIS SERIES. THIS WILL HELP YOU BETTER UNDERSTAND THE DETAILS FOR EACH SECTION OF THE ACMV SERIES.
As I said before, flat walls are as easy as it gets when it comes to installing manufactured stone. You really have to try to mess up an open wall, but you know what they say: where there is a will there is a way. The MVMA guide doesn’t say a lot about how to treat large open spans of walls. My guess is that this is because if you install the two layers of weather barrier, and do a good job on your mortar bed, things should stay dry. But once you reach a corner (inside or out), then you have to follow some rules. These rules are simple, yet I still find the work done incorrectly. Sometimes I think these installers are doing it wrong on purpose.
Manufactured Stone Veneer- Walls and Corners
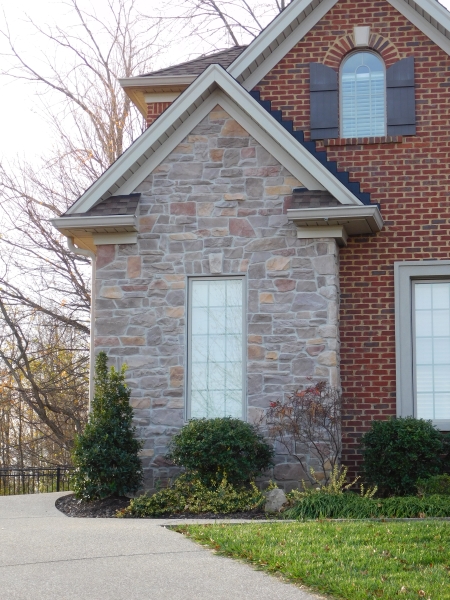
If your install of manufactured stone wraps an outside corner, you are to use pre-made corner pieces first and run those up the outside corners. You then use the flat pieces to fill in the middle of the wall. This keeps the delicate outside corner covered and sealed, and it just looks better. Here is a picture of what the corner pieces look like before they are installed on the house.


As I said before, sometimes it’s as if the contractors do things wrong intentionally; although deep down I know it’s because they either just don’t care or just don’t know. Here is a corner where the installer simply ran flat pieces up to the edge of a corner when they got low enough you couldn’t see it from the ground (these shots were taken on the roof.) You can clearly see the seam that it leaves exposed. What makes this particular install especially poor is that they did a shoddy job of wrapping the WRB (weather resistant barrier), and you can see the raw OSB plywood behind the stone. It is simply a matter of time before the walls of this house rot away.

CLEARANCES AND DRAINAGE
Let us beat the proverbial dead horse, shall we? What you must keep in mind about stone siding: It is not a question of if water will get in, but a question of how much water will penetrate behind the surface. Water soaks through the stone veneer itself; it wicks in around the cracks, it gets beamed through by Scotty…well maybe not that. The point is, you can’t stop it. You can only control it. There must be a way for this water to escape in the form of natural drainage. This also means there must be clearances where the stone meets another surface (like front porches, roofs, sidewalks, etc.) to give this water a place to run to, and evaporate. If we look back to our old friend, the MVMA guide, it tells us we should have several inches of clearance at the base of walls, around porches, and on top of shingles (hard surfaces), and a 4″ gap at dirt/grass/mulch.
Every place that concrete stone veneer touches another surface, there should be a drainage gap.
Now, I get it. The gap doesn’t look great from an aesthetics standpoint. But do you want a small gap in the stone at the base of your wall, or do you want rotting walls behind your stone? Here is the detail from the MVMA guide on what the base of the walls should look like. The areas that have been highlighted in red are the pieces that are, in my experience, always left out.

Now check out what I see in the real world. The manufactured stone is ALWAYS touching the porch and sidewalks. It is always buried in the mulch (or grass). In fact, I have never seen this detail correctly installed around the base of the wall. Here is a collage of images from homes that all have the same problem. No drainage behind the manufactured stone. No place for the water to escape.


DORMERS AND ROOFS
The roof line is another problematic spot where massive amounts of water are intermittently present. If the rules aren’t followed in this area, the exposure of the manufactured stone to all of that water will most certainly cause issues at some point. Much like their guidelines for stone near the ground, the MVMA recommends leaving several inches of clearance around the roof line. This area can get tricky, because a correct install here requires that both the siding contractor, and the roofer know what they are doing, that they communicate with each other. Most of time these folks are not on the job site at the same time, so how effective do you think they are about relaying information between them? Here is a colored image from the MVMA guide so you can understand better what things should look like, followed by what I see in the field.


HISTORY REPEATS ITSELF
Back in the 80’s and 90’s there was an extremely popular siding known as EIFS (Exterior Insulation Finishing System), also known as synthetic stucco. It was primarily installed on higher end homes. The installers back then ignored the rules and didn’t follow the instructions when it came to drainage and details around windows/doors/etc. It didn’t take long before EIFS problems turned into an epidemic in just about every area of the country. The water got in, and got trapped. Houses rotted from the inside, lawsuits started flying, and an overall good product like EIFS got a black eye. After all, when installed correctly, EIFS performs great. The problem was not the product; it was the installers using it who didn’t read the instructions, and everything fell apart just a few short years later.
Fast forward 20 years. History repeats itself.
Now there is a new synthetic siding on the market. One that is failing when not installed correctly. A siding that is trapping water and rotting homes. A siding in which the details are being ignored by the installers. The BIG difference between manufactured stone veneer and EIFS as I’m seeing it is that while EIFS was primarily installed on high-end homes, manufactured stone veneer is being installed on starter homes, mansions and everything in between. So when the lawsuits start flying this time, manufactured stone is going to make the EIFS problems look like the common cold compared to the Bubonic Plague.
If you have Manufactured Stone Veneer Siding (ACMV) on your home, I strongly suggest you get it checked out. Research and locate a highly qualified home inspector or find a moisture intrusion expert contractor.


Great article! I kind of figured this was what waz going on. Now, how to fix it. Im assuming one would have to rip it all off and start over. Fortunately mine just screws on with back flashing that is cast into the veneer, it wont be hard taking it off. I fear whats behind it though.
Great article! I kind of figured this was what waz going on. Now, how to fix it. Im assuming one would have to rip it all off and start over. Fortunately mine just screws on with back flashing that is cast into the veneer, it wont be hard taking it off. I fear whats behind it though.
Fantastic information! My husband and I are building a garage and will be having a stone veneer installed to cover a 4 ft. tall concrete block wall. The remaining garage will be 2 x 6 construction with Hardie Board exterior. Can you give any recommendations for proper installation? For example, would a weep screed still be needed?
You’ll want to follow the MSV guide produced by the NCA. They give you every detail and a breakdown of the layers. Download MVA Installation Guide