How to Air Seal Electrical Boxes in 3 Steps
Why is air sealing electrical boxes important? I’ll let you in on a little secret regarding home energy, comfort, and efficacy. Insulating your home is only half the battle for saving money on your energy bills and being more comfortable in your home. And one of the easiest things you can do is to air seal your electrical boxes.
The other half of it, and some would argue the most important half, is that you must air seal the walls/ceiling.
Just about every penetration in your home is because of an electrical box, so it is crucial you air seal electrical boxes in every room, on every wall, and on all the ceilings.
This is also known as the building envelope. The goal is to stop air movement from the living space and the outdoors. If you caught my DIY Guide to Blown-In Attic Insulation, you know I spend the better part of a week going through my attic, sealing off any penetration that may allow air to travel between the attic and the living space.
This was all before installing the insulation. The devil is always in the details, and air sealing your home is a step that must not be skipped.
Oh, and before the technical pitchforks come out and try to correct me for using the wrong term in the above heading. Yes, I know the proper term is a receptacle, however, the term outlet (or box) is what most homeowners call their receptacles, so I chose to use that term so they could understand.
The second law of thermodynamics says that heat flows naturally from an object at a higher temperature to an object at a lower temperature; and heat doesn’t flow in the opposite direction of its own accord.
This means hot moves to cold on its own. In the winter, your warm air is trying to escape the house, and in the summer, the warm air outside is trying to get in.
It’s a never-ending battle. Every little crack and hole in your house is a path for air to move, and for you to lose money and comfort. It is also making your furnace/air conditioning work harder and run more often.
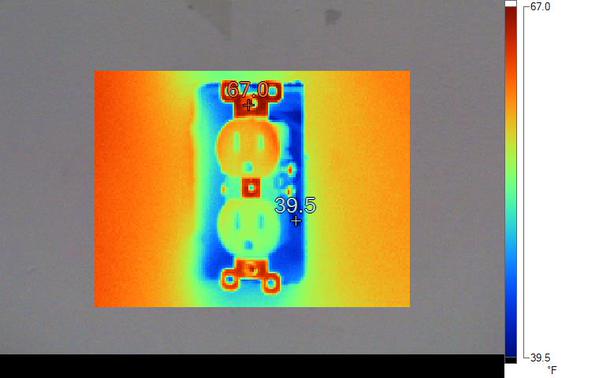
Behold the beautiful wonder of thermal imaging! I love my thermal camera. It has made me a hero more times than I can count during my home inspections. Thermal imaging inspections take a home inspection to a whole new level. You can see in the image below, an electrical outlet in my house.
I’ve marked the high and low temps to make it easier for you to understand the colors. The blue area is all the cold air leaking in around the edge of the electrical box, and the holes where the wires come into the box.
HOW TO AIR SEAL YOUR ELECTRICAL BOXES
Stopping these leaks or drafts is a small piece of a larger puzzle, but still a piece nonetheless.
The first thing you do is kill the power of whatever you are working on. Don’t try any of this on a live circuit or you could be shocked or worse, electrocuted. Don’t be stupid.
Now that you’ve turned off the power you’ll want to remove the outlet itself. GENTLY pull it straight back and out of the box. If the electrician who wired your home left the conductors too short in the box to safely pull the outlet up and out of the way, stop now.
You could pull the wires off the outlet, break a conductor, etc. You’ll want to call in a pro to have your wires extended. If you can pull out your from the wall, and you have enough room to work, carry on.
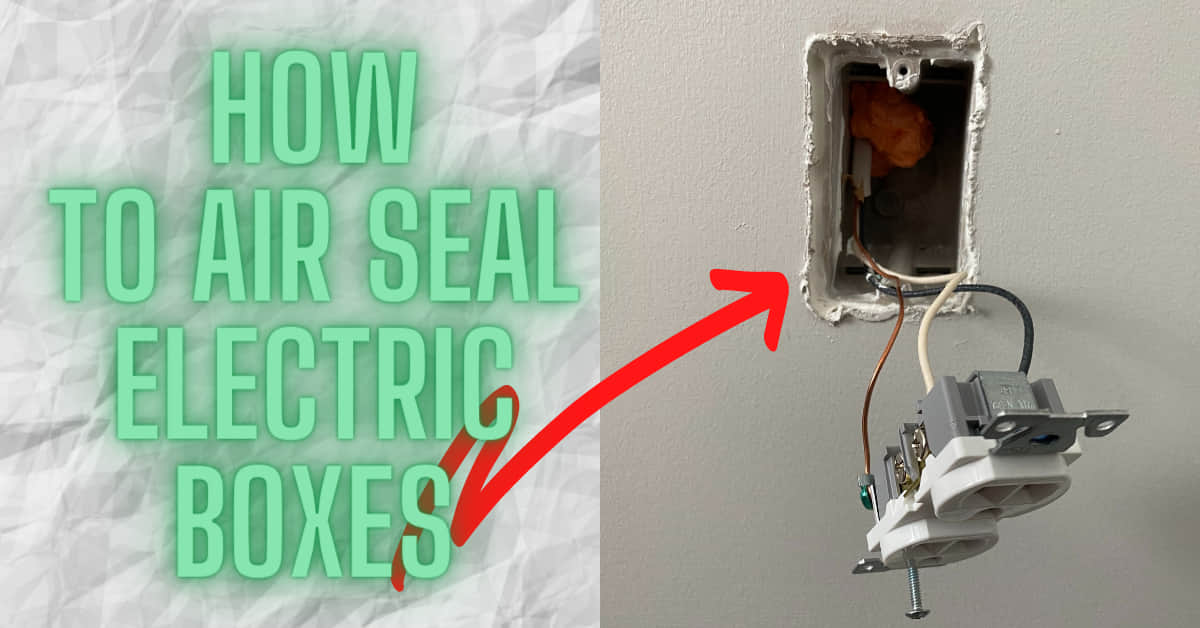
I use caulk and expanding foam to seal the box. Using a high-quality painter’s caulk, caulk the edge of the electrical box to the rough cut drywall itself. I got lucky and the drywallers did a decent job of cutting out for my boxes, so the gap is not very big. If your home has the Friday afternoon cut jobs (really bad), you may need to use a lot more caulk. Your mileage will vary on how much it takes to seal this up.
Now that the box-to-drywall connection is sealed, let’s focus on the wire penetrations. You may have one, two, or even three sets of wires coming into the box itself. This number will vary on how outlets/switches are in your box. Treat them all the same here. I have two sets of wires coming in to deal with. A small shot of spray foam around each wire is all it takes. You can see here how the foam will spread itself around the wires and seal them up.
Heads Up! Expanding foam in the disposable cans can get pricey. Once you crack the seal on them the clock starts before it becomes useless. Remember, a little goes a long way with expanding foam. This stuff will grow and grow once you squirt it out. If you get trigger happy and get too much in the box; just let it cure and dig it out later. Don’t try to touch it wet. You’ll just end up with a sticky mess on your hands. One can will likely air seal every junction box in your house. So if you have to buy these types of cans, you may want to tackle the whole house at once to save on spray foam.
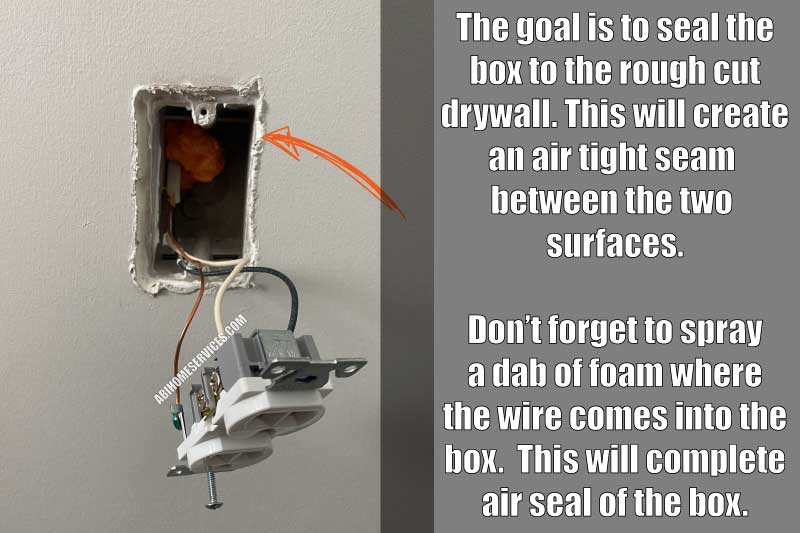
Understand that what we are working on is the air sealing of this box, not the insulation around it. We are still seeing cold temps and blue coloring because the insulation around this particular box is non-existent. This receptacle is above my fireplace where most builders do not attempt to insulate. I’ll tackle the insulation another time.
This procedure is good for just about every penetration in your home’s envelope. All your receptacles, light switches, hard-wired smoke detectors, ceiling lights, ceiling fans, and any other hole you may have. It’s a quick process. Takes me about 2 minutes per box to seal it up, and you reap the benefits instantly.
One last thing – If you are in the process of building your home and have the ability to add something like The Box Shell to all your electric boxes I think that is a great idea. This cardboard form will air seal and insulate around the box once the foam is applied. The guys over at Green Building Advisor talk about it here.


Ben Hendricks
Hi, I’m Ben, and I inspect houses. I grew up with a hammer in my hand, and have been a professional home inspector for 15 years. My blog is here for info about home inspections around the Louisville, Kentucky area, and just about anything construction-related.