Missing Kick-Out Flashing Creates Hidden Water Damage in Walls
KICK-OUT FLASHING ON STONE VENEER SIDING
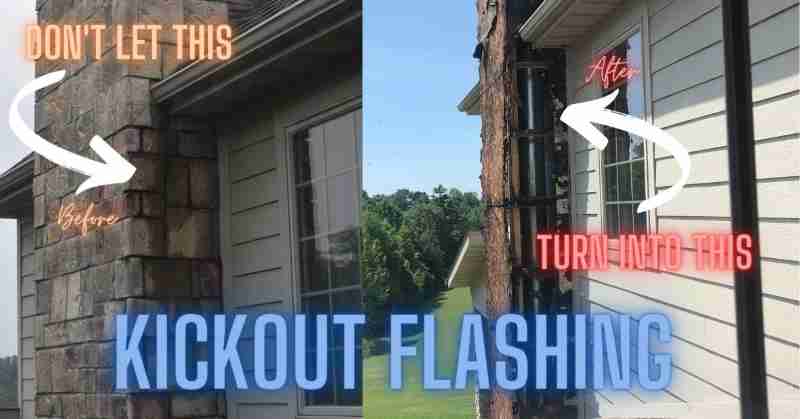
In my last post, I wrote about what kick-out flashings were, how long they have been required in the building code, and what happens when they are omitted. If you missed that post, you can check it out here: Kick-out Flashings.
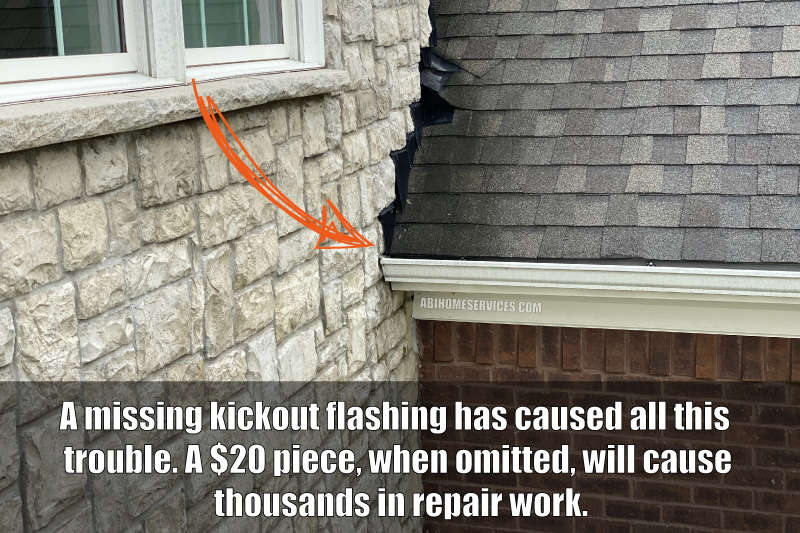
This go-round, we’re going to take a close look at a home where the builder omitted the kick-out flashing and the catastrophic damage that resulted from that error. It really is amazing how much water damage can occur in just a few short years as a result of a botched install of manufactured stone veneer and missing kick-out flashing.
The scary part is that nearly every home in the country with manufactured stone veneer will leak and suffer the same fate as this house; the owners just don’t know it yet.
To be clear: kick-out flashings are required on EVERY type of siding/cladding that you can think of, not just manufactured stone veneer (or stone veneer).
It just so happens that the damage on this home was caused by the lack of a kick-out flashing on a manufactured stone veneer installation.
I see much more damage from missing kick-out flashings on homes with lap siding (vinyl, wood, and fiber cement) and stone veneer than I do on homes with brick veneer. Brick veneer doesn’t suffer nearly as much catastrophic damage when the kick-out flashing is missing, due to the required air gap in the wall assembly. That single inch of clearance between the wood and the back of the brick is a lifesaver.
If you want to see what can happen when the air gap is missing on a brick veneer house, check out my article on failed brick veneer mixed with manufactured stone veneer.
This story starts with a general home inspection in Louisville, KY. The home inspector that the buyers hired had read an article on failed manufactured stone veneer that I wrote and wisely recommended that someone come out and perform an inspection of the stone veneer, just in case there was a hidden problem that he couldn’t see on the surface.
The potential buyers requested that this inspection take place, and the sellers of the home reached out to me to set things up for the following week. Because they saw no damage to the home on the surface, everyone involved (both buyers and sellers) believed that there was nothing to worry about. Unfortunately, they were very, very wrong.
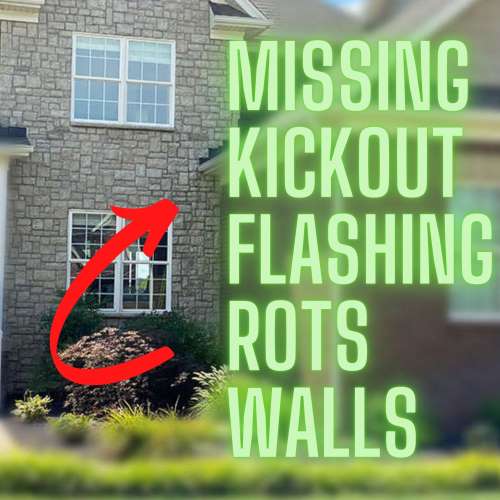
There were visible signs of potential issues on this home…but you have to know what to look for in order to see them. Look at the image below. The manufactured stone veneer under the gutter and to the right of the window is several shades darker than the rest of the stone veneer. You can clearly see the stark difference between each side of the lower window.
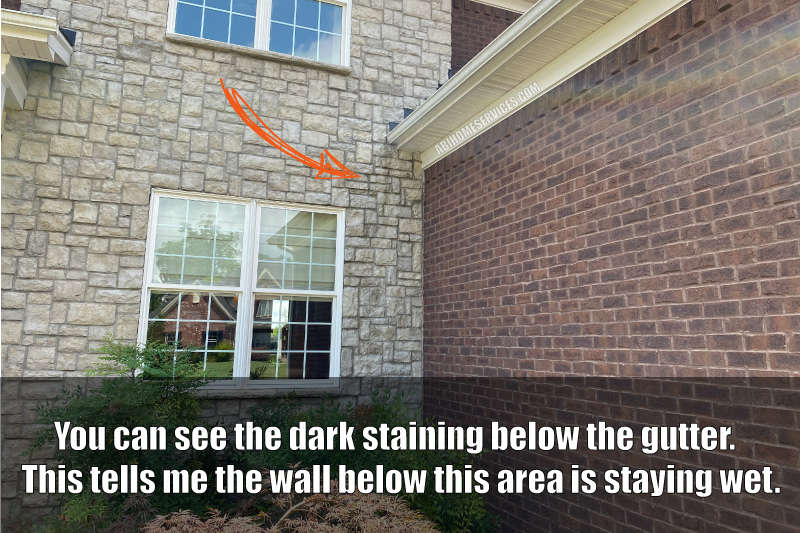
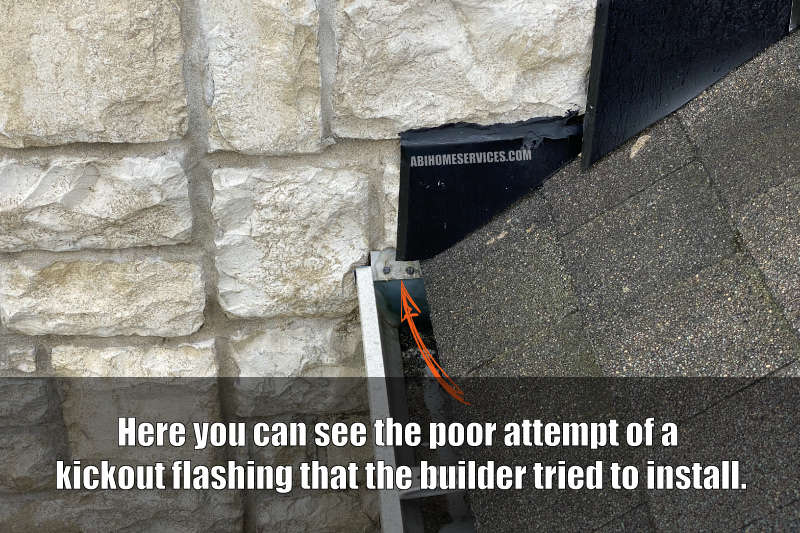
The builder’s roofer had omitted the kick-out flashing where the front stone veneer wall meets the garage roof. This type of architectural design is susceptible to water intrusion by nature. Add in the missing kick-out flashing and manufactured stone veneer, and you have the perfect recipe for massive amounts of water damage.
I get it. Damage on a five-year-old home can’t be THAT bad, right? What could go wrong in that short amount of time?
Well, a lot.
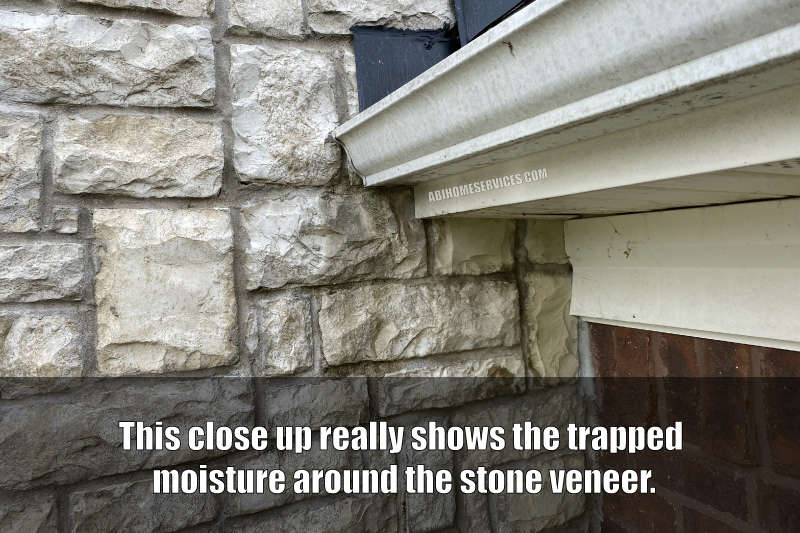
The truth is, we can fill an entire wall with water, one drop at a time. The building materials we use today soak up moisture like a sponge (I’m looking at you OSB). And because we seal our houses up to stop airflow in the name of energy efficiency, there is nothing to help those materials dry out if they get wet.
The series of unfortunate events goes like this:
- Something leaks and lets the water into the building.
- The materials soak up the water that just leaked in.
- Everything around the area falls apart from rot.
And the number of water drops that can leak in over five years can add up to a lot of damage.
KICK-OUT FLASHING INVASIVE INSPECTIONS
It’s important to note that this work is beyond the scope of what I do on my daily home inspections. You should not expect any home inspector in your area to do anything like this on a routine home inspection.
On those routine inspections, inspectors cannot cut into walls to investigate problems as I did here. In those circumstances, inspectors look at the surface of a situation and try to discern what is going on underneath it all. It is not an easy task.
At best, if your inspector sees manufactured stone veneer installed on the house, he should tell you to call an expert and have it evaluated and inspected.
At worst, he won’t say anything about it–because you don’t know what you don’t know. I’m working to change that by helping educate home inspectors, Realtors, and homebuyers all over the country. You sharing these articles on social media will help me educate the masses, so thank you in advance.
I start all of my inspections the same way. I survey the situation and come up with a plan on how to tackle the job. As I was checking the basement area of this home, I noticed a faint water stain on the ceiling under the front wall. There is no plumbing anywhere close to this area, so I determined that the water had to be coming from an outside source: a leak in the building’s envelope.
Wikipedia describes a building envelope as “the physical separator between the conditioned and unconditioned environment of a building including the resistance to air, water, heat,[1] light, and noise[2] transfer.”
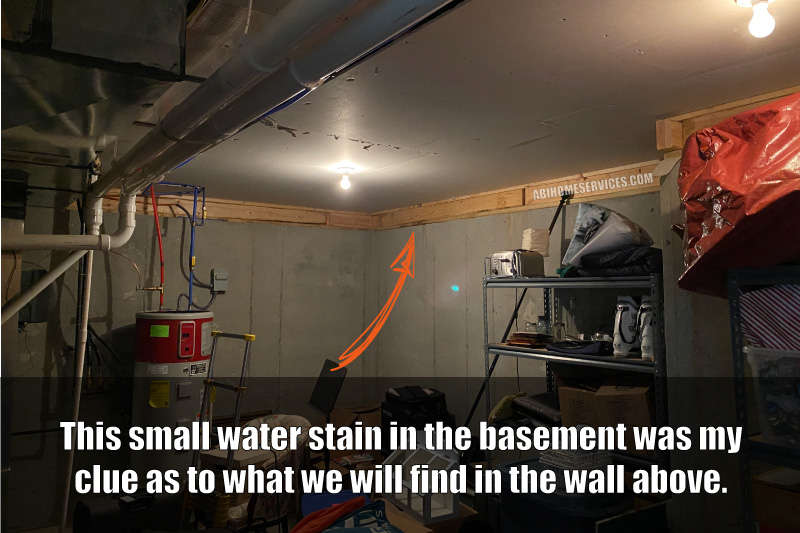
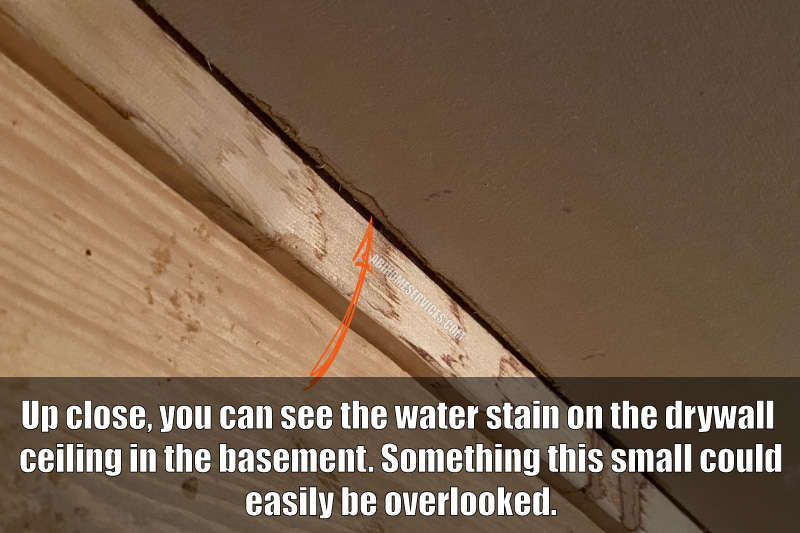
Once I got closer to the water stain, I noticed more stains on the drywall ceiling, not just the floor joist. This, too, was another clue that we were dealing with outside water leaking in.
Sometimes during the construction of a home, water will leak a bit through the framing and down the concrete foundation wall while the different parts are coming together. Therefore, a water stain on a wall in the basement may or may not be a current problem. I have no way of knowing which water stain is from two months ago and which occurred during the construction process five years ago.
What I do know is that the drywall phase of a home’s construction doesn’t take place until the structure has been ‘dried-in.’
If water has stained the drywall on the ceiling in the basement, that means we have a leak that occurred long after the envelope was finished.
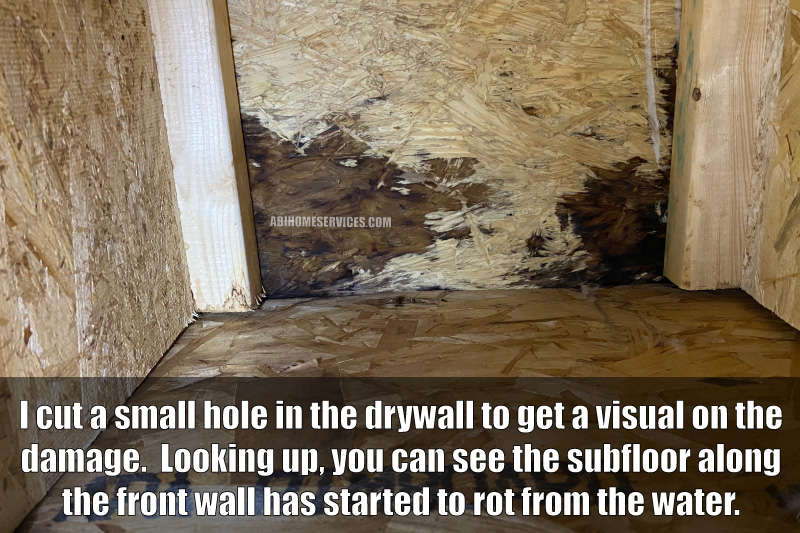
I cut a small hole in the drywall to get a better look and confirm my hunch. The sub-floor around the front dining room had already begun to rot from water damage. This damage was scanning wet with a moisture meter, so I knew it was a current problem.
This leak had been going for a long time; most likely since the house was built.
We all know water runs downhill, and I was below the grade looking up. It was time to pinpoint the source of the problem, which meant opening up the wall above this area to get a clear view of the damage.
After discovering the water-damaged subfloor in the basement, I shifted my attention back upstairs to the wall behind the discolored manufactured stone veneer that I noticed earlier.
Using my extension probes, I was able to get a moisture reading through the wall without cutting a hole in the drywall. As I began to slip the needles of the moisture meter probe between the edge of the electrical box and drywall, the moisture meter started to chirp and scream its siren song (it beeps when water is detected). As the probe’s hilt met the wall, the beeping had gone full tone, which meant wet. Really wet. At this point, I had a heart-to-heart with the owners.
“Here’s the scoop. We have visible wood rot in the basement, and I’m getting really high moisture readings inside the wall upstairs in the dining room. More than likely, we have a large amount of water trapped inside this wall cavity, but without opening things up, there is no way of knowing the severity of the situation.”
“Do whatever you need to do,” the homeowners said with sad looks on their faces.

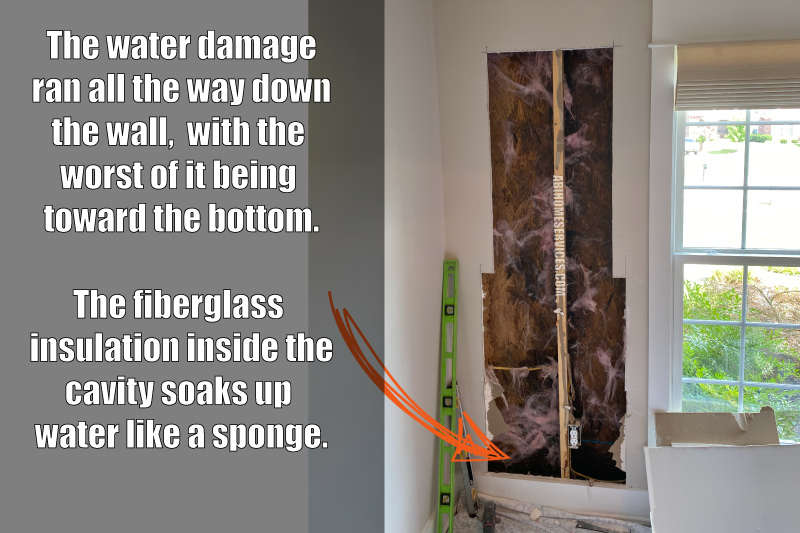
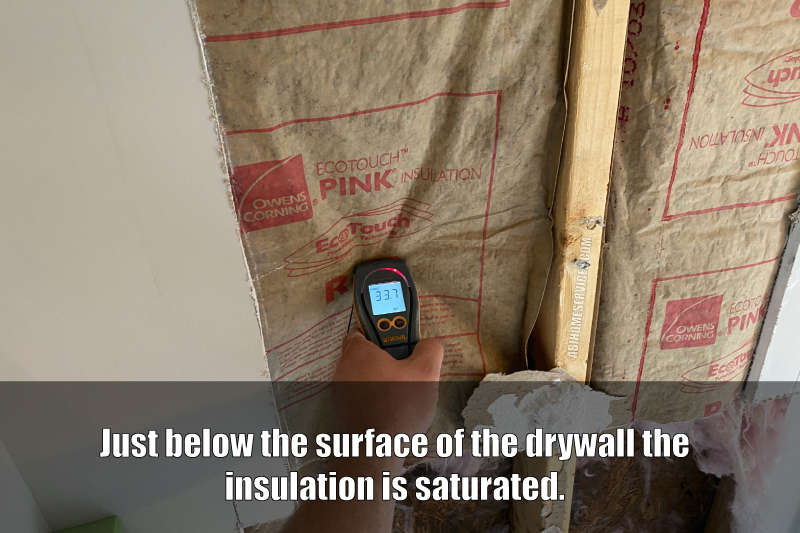
I measured out the area on the drywall and started my cut at the base of the wall. I had to stop every couple of feet to clean up and add more soaking wet fiberglass insulation to trash bags. The damp smell of wet wood hit the room along with the fragrance of mold.
You know that smell. It’s a mixture of wet, musty, and rot.
MOISTURE METERS DO NOT DETECT HIDDEN WATER DAMAGE.
Right now, I’m speaking to all my home inspector brothers and sisters.
If you are using a moisture meter during a home inspection, the data it gives you may not be the actual truth of the situation.
Let’s take this house as a perfect example. The inside of this wall is a wet, mushy, moldy mess. The OSB has turned almost to mulch just a few inches below the surface. Things are so wet and nasty that the water has collected along the bottom of the wall and drained down into the basement through the floor’s structure. It’s about as bad as it can get.
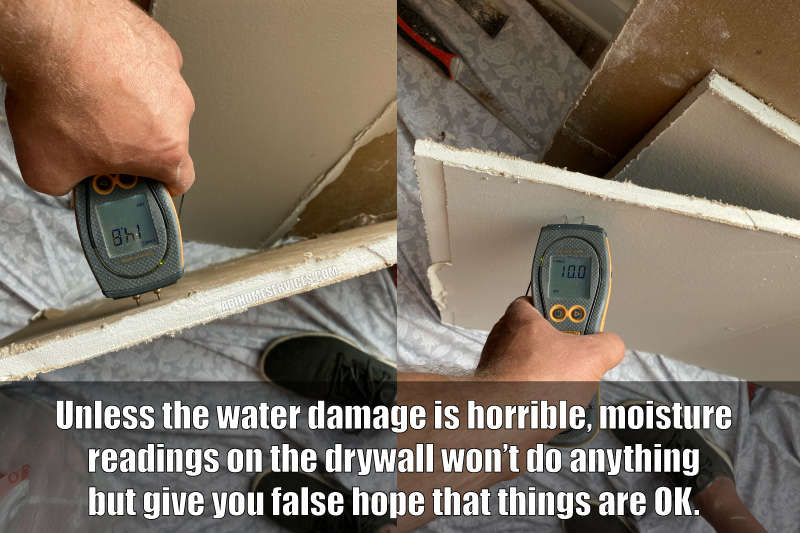
Yet, when I checked the drywall with my moisture meter along the base of the wall, it was perfectly dry.
When I used a moisture meter to check the wall’s surface, nothing seemed out of the ordinary. It all appeared to be dry.
Look at the image below. That is a chunk of the drywall that I cut out, and it is completely dry.
Your moisture meter will give false negatives (and false hope) if you do not know how to use it properly. You have to understand the limitations of your tools.
Another example of those limitations is this: My thermal imaging camera was completely useless in this inspection. I scanned the wall with it before I started cutting, and there was nothing there to indicate a problem. Often, there is not enough temperature difference for anything to show up with a thermal scan.
Please understand that I am not discouraging you from using moisture meters and thermal imaging cameras. Used properly, they are great tools that will make you better at your job. But if you do not understand the science on how they work and what their limitations are, you will inevitably give someone bad information, and no one wants that.
REPAIRING THE WATER DAMAGE FROM MISSING KICK-OUT FLASHING
And now we come to the repair. Since we can see that the cause of the problem is the missing kick-out flashing, one option would be to remove only the stone around the gutter and down the damaged wall.
The downside to this is that it is all but impossible to match the stone and mortar around the rest of the exterior wall when you put things back together. The repair work will stick out like a highlighted section of the wall.
The other option would be to remove all the stone veneer and start over. This, of course, would remove the chance of the wall not matching once the repair work has been performed. The downside of this approach would be the cost. Removing this amount of stone veneer could easily creep past $10-15,000.
It really is a shame that so much moisture damage can stem from a missing $20 piece of flashing.





Great write up thanks for sharing. I see this so much here in Wisconsin. I have done many repairs to walls without kickout flashings. Worst one was in Maryland on a 10 year corner studs and trim rotted as well as 2′ of subflooring into second floor room.
It’s a problem all over the country it seems. Keep fighting the good fight!
Great video ????
Thanks, Steve.
OMG! We are dealing with this EXACT problem on our ten year old home. We moved in less than one year ago and our ‘home inspector’ never said a word about the missing kickout flashing!!! Why didn’t he warn us?!? Now we are stuck with a huge repair (almost $12,000) and the inspector is denying any fault.
We think he should have told us about this and have hired a lawyer to help recoup some of our cost. Could you help us with our lawsuit?
Hi Kelly,
I’ll be happy to speak with you about the situation. Please feel free to give me a call and we can discuss things in private.
Hi Ben, I am in Louisville, KY as well and we are having a leak problem around our chimney and I think what you describe here is what is happening to our house. The worse part it we had a home inspection done before we bought the home and they didn’t say anything about it. How can I schedule to come look at my new home and tell me what is going on?
Hi Michelle- feel free to give me a call, and we can discuss things.
Nicely done, Ben.
Thanks!