Sealing My Ductwork With Aeroseal
As some of you know I’ve spent the better part of 20 years tearing apart and fixing houses. There’s not much I can’t do when it comes to home renovation. However, I can only repair what my fingers can touch, and my latest challenge required some help from an old friend. Allow me to give you the setup….
My wife Michelle and I bought a foreclosed home about 3 years ago. It was in rough shape, but nothing really scares me when it comes to this stuff, so we jumped in head first. It’s taken us a lot of work, but we’ve slowly but surely remodeled just about every room. One of the first rooms we tackled was “Michelle’s Room.” It’s a small 3rd bedroom that she likes to retreat to and read, and get away from me (her words). The one nagging issue with Michelle’s Room is that it was always much hotter or colder than the rest of the house. 7 degrees to be exact.Very noticeable indeed for a single story ranch home. Let me put that in perspective for you. When it was 68 in my living room, it was 61 in Michelle’s Room. And believe me, I heard about it every time she crossed the threshold of that room. You know what they say; A wife that is cold will b#$!@ about it until you fix it. They do say that, right?
I did what I could on my own. I scanned the room with my thermal imaging camera hoping to find a large missing area of missing insulation. Even if it meant tearing out a wall, it would be a solution to a problem. But alas, no low hanging fruit this time.
The stars aligned about a month ago, and I was called upon by my old friend Brandon with KY ENERGY PRO to perform a home inspection on a house he was buying. During his inspection, I mentioned my struggles with the temperatures in this room, and he started talking about this Aeroseal stuff. I came home and started doing my own research, and I liked what I saw.
HOW TO FIX LEAKING DUCTWORK
I’d say 99% of the houses I’ve inspected have ductwork systems that were never properly sealed up, and they leak like a sieve. Little holes here and there may not seem like much, but a thousand small holes add up to one big hole. And all those holes mean less air getting where you want it to be. According to ENERGYSTAR, most ductwork systems leak out about 30% of the air that is pushed through them. I’ve seen some systems that I bet would be pushing 50-75% leakage. I’ve lost count the number times I’ve been in a nice and toasty warm crawlspace in the middle of winter from a supply run that was completely disconnected and dumping hot air under the house. How people don’t notice one room is really cold is beyond me, but it happens a lot. Or maybe they notice it, but just don’t know what to do about it.
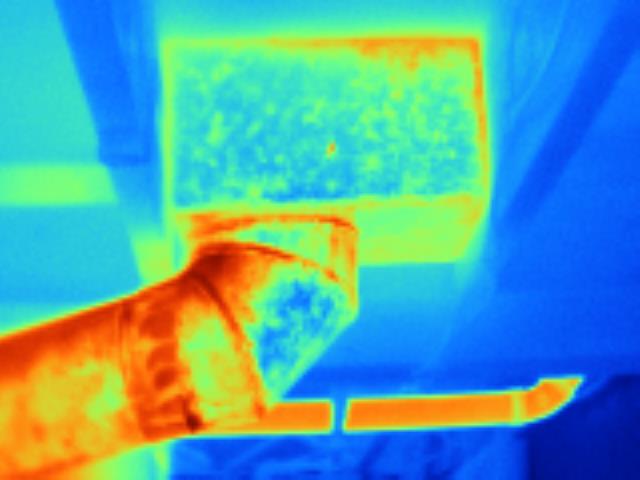
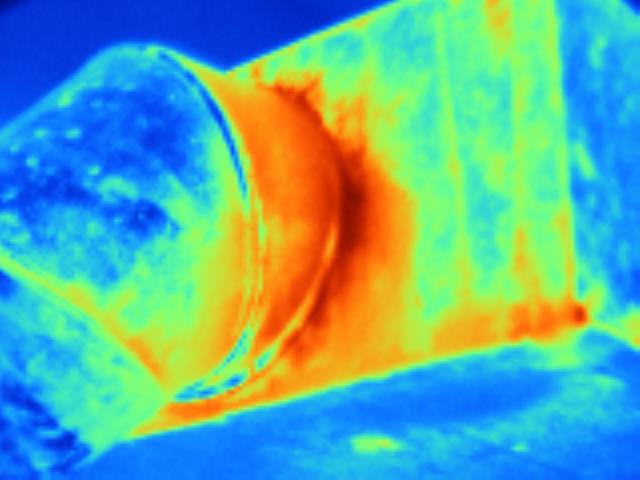
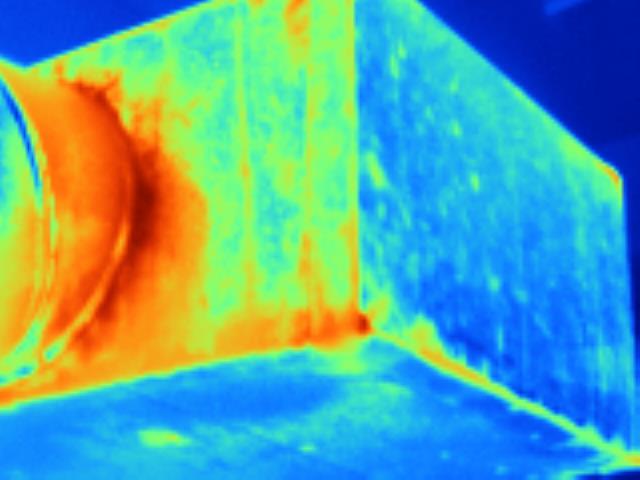
Check out the thermal image scans of ductwork that I took on what I consider to be an average house below. You can see the deep red color that is showing up on each image. That is the hot air from the furnace seeping out of the cracks and holes that occur in all ductwork. Every wisp of air that leaks into your floor, your wall, your attic, or your crawlspace is wasted energy and money.
INSTALLING AREOSEAL DUCTWORK SEALANT
Traditionally, most people think of air sealing their ductwork with some kind of tape. Back in the day we used to use…. yep, duct tape. My father-in-law’s favorite “tool.” It would work for a while, but the glue on the tape would dry out and the fabric would fall off over time. The next evolution in tape was foil tape. It works great, stays in place, and doesn’t fall off over time. But, the accessibility for air sealing with this tape are still limited, because unless you’re sealing during the construction of your house, you won’t be able to reach every crack or hole. This is where Aeroseal is different. It seals your ductwork from the inside-out. So you don’t need to worry about being able to get to all the cracks and holes. It seeks them out and seals them up.
Here’s how Aeroseal is applied in your home. First, the ductwork system is isolated from the air handler (the part of your HVAC system most of you call your furnace). All of the supply and return runs are then sealed off with tape and foam blocks, and a big fan is connected to the ducts. The duct runs are pressurized with the fan, and the liquid Aeroseal is pumped into the ductwork system. Since the ducts stay at a constant pressure (with the fan running), there is a constant stream of air that is leaking out of all the cracks and holes (think of it like a balloon with a pin hole in it). The liquid duct-sealant is then sprayed into the air stream where it sticks to the edges of any hole as it leaves the ductwork. It builds upon itself until the hole is filled, like a liner that is sprayed inside the duct system.
I have a large hole in my supply trunk that my UV light is installed in. To help show you how this process works, I used some fiberglass mesh tape to mimic a bunch of smaller holes. The raw footage for this was about 20 minutes, so I sped things up so you can see how the duct sealant is able to build up and seal up holes. Keep an eye on the small yellow squares. They will fill up with Aeroseal as you watch the video.
PREPPING YOUR DUCTWORK FOR AEROSEAL
When the guys from KY Energy Pro first arrived at my house, they assessed the room in which my furnace was located. You need a good amount of room to work during this process, so if everything you own is stacked 8 feet high around your furnace, be ready to move it all. I was told that at least 5 feet of clearance was needed around the unit (if you can swing it). Now that we have a decent amount of clearance, let’s light this candle.
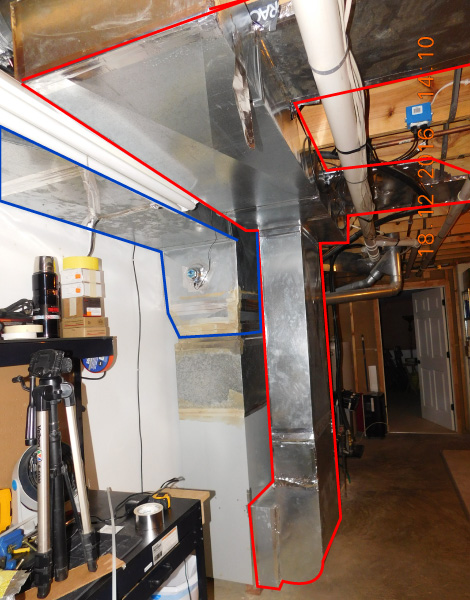
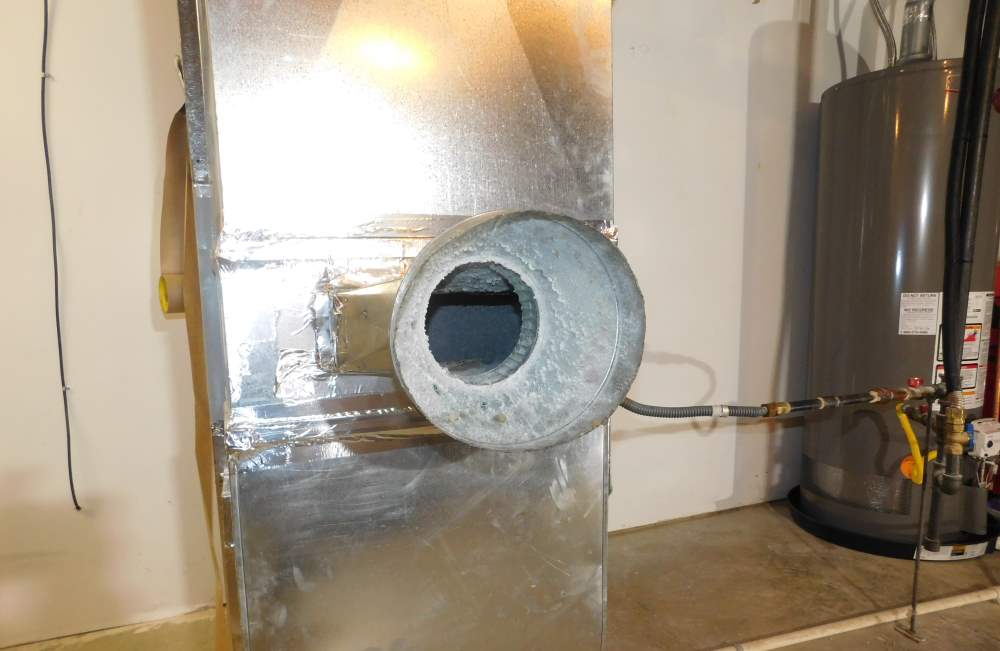
The first step is to isolate the air handler from the duct system. This means your supply and return will essentially turn into two separate runs. This step is vital and can’t be rushed. If the technician does a poor job and the sealant gets past the wall he builds, it will likely ruin your air handler and a new one will be needed. I’ve highlighted my supply run (in blue) & my return run (in red). Once all this has been done, you can isolate sections when testing for leakage to see where your biggest problems are. Mine was leaking at the return more than the supply.
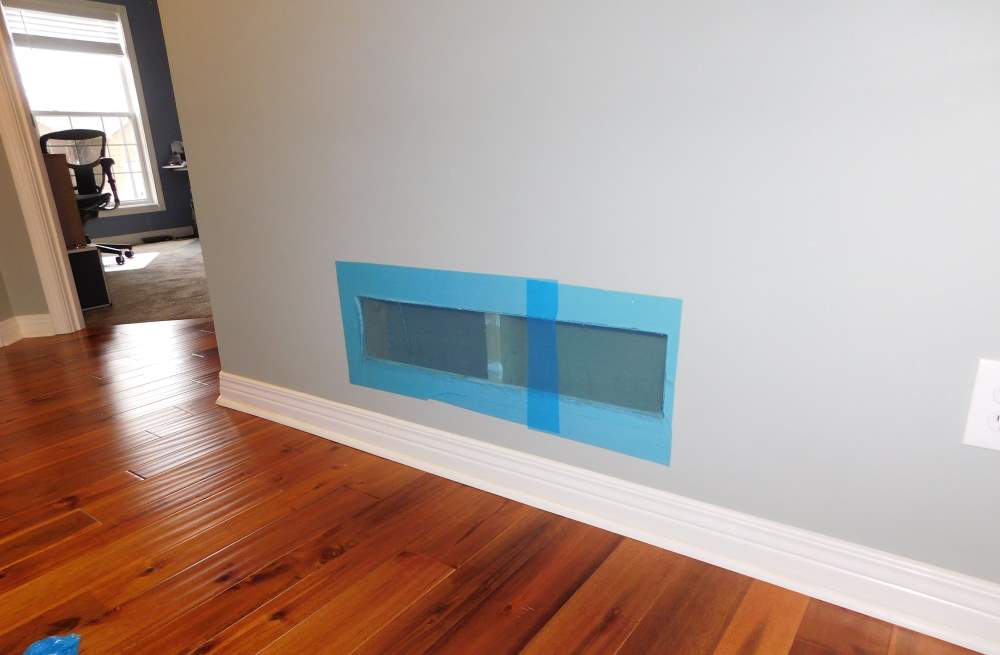
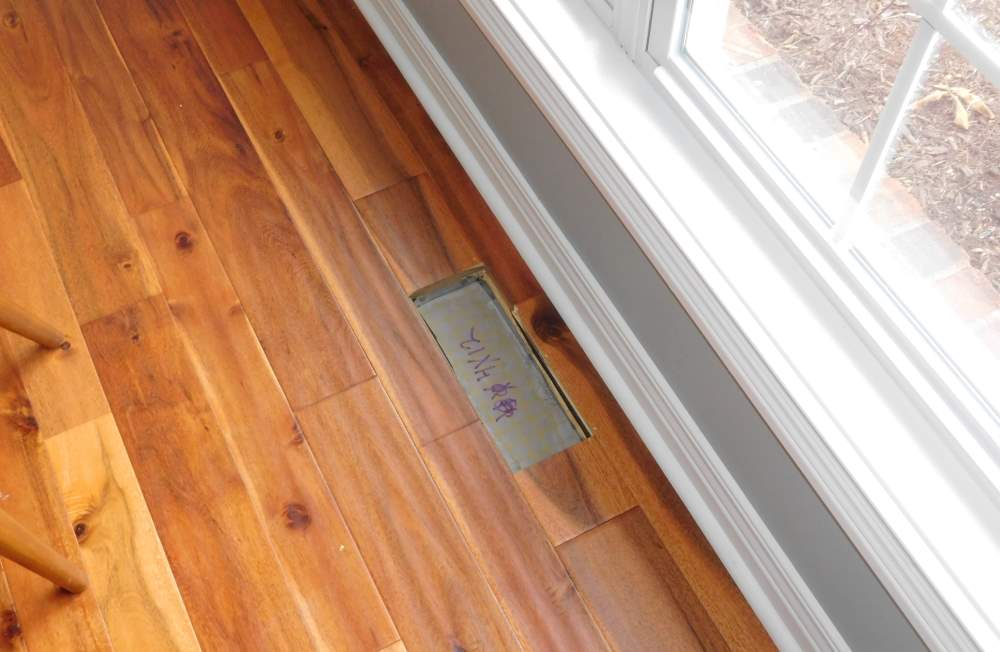
Once the air handler is sealed off, the crew concentrates on getting the rest of the ductwork sealed up as much as possible, and getting the access ports installed. All of the grills around the house are removed and are either stuffed with a conforming foam block or masked over to seal things up. This is done because you have to be able to pressurize things for the process to work, so no big gaping holes are allowed. There is also an access port cut into each (supply & return) run. This is the spot that the duct sealant is pumped into. Once the job is complete, these ports are removed and new sheet metal is installed and sealed. Now that everything is ready to go, it’s time to attach the Aeroseal fan and field-made ducts to my house and start sealing!
INSTALLATION PROCESS
Now that we have everything prepped, it’s time for the fun to start. The Aeroseal system uses a large tube of clear plastic “ductwork” that is assembled on site. This is because every house is different, and the team never knows what they’ll be walking into. These tubes are single-use, and are disposed of after the job is completed. The ducting leaves the Aeroseal fan and is connected to a wye. One side heads over to the supply port, and the other to the return that was just installed in my home’s ductwork. Here is a quick video of the setup.
Once everything is connected and double checked to be air tight, the team starts by turning on the fan to pressurize the system and see how leaky the ducts are to begin with. This gives them a baseline number in which to gauge progress as they pump the Aeroseal into the system. You can literally watch the leakage numbers decrease during the sealing process. So, how did I do with my starting numbers? Not good at all. What really surprised me about this is that I had taken the time to seal up my ducts as much as I could a year ago. This told me that there was a ton of leakage that I couldn’t get to, and no matter how hard I tried, I would never be able to fix it myself. My test-in numbers were as follows:
Ductwork Leakage
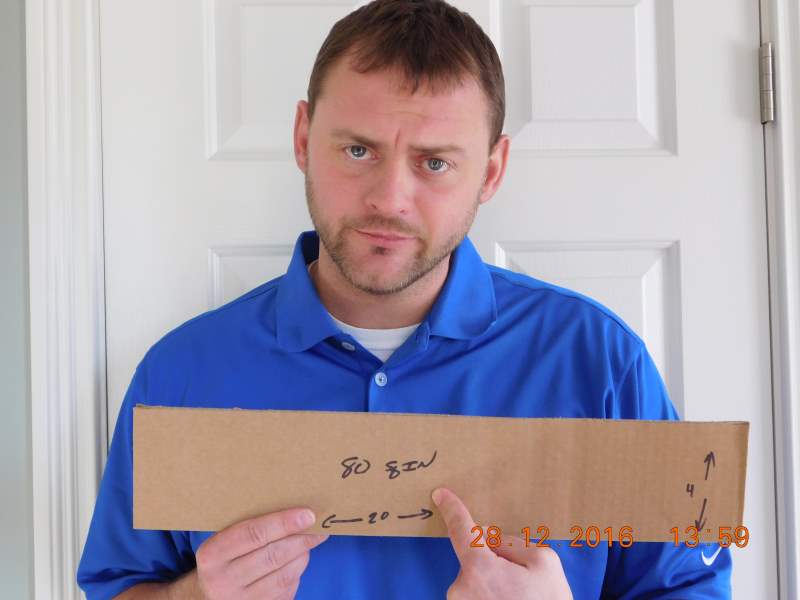
Here is what a hole of 80-sq inches looks like. This was my total duct air leakage prior to having the Aeroseal installed.
419.6 CFM
This is air leakage. It equals 251.8 refrigerators full of air loss every hour. That’s a lot!
79.3 Sq In Hole
That amount of air is equivalent to a hole this big. Holy Moly!
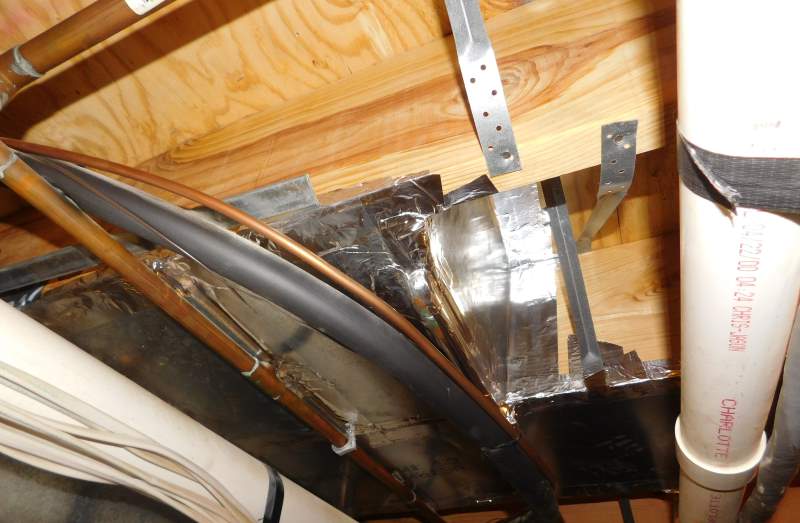
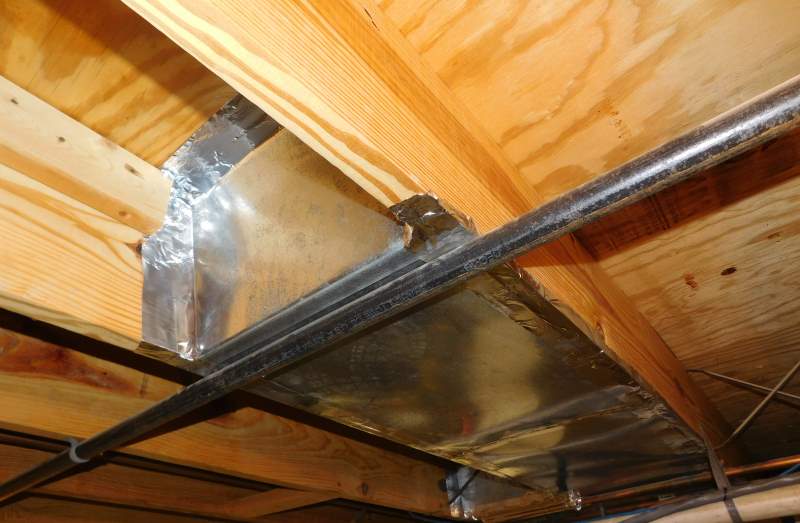
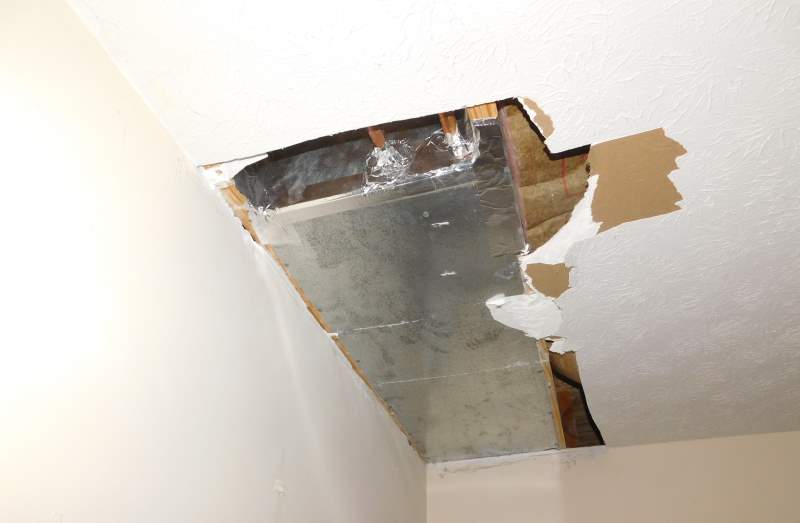
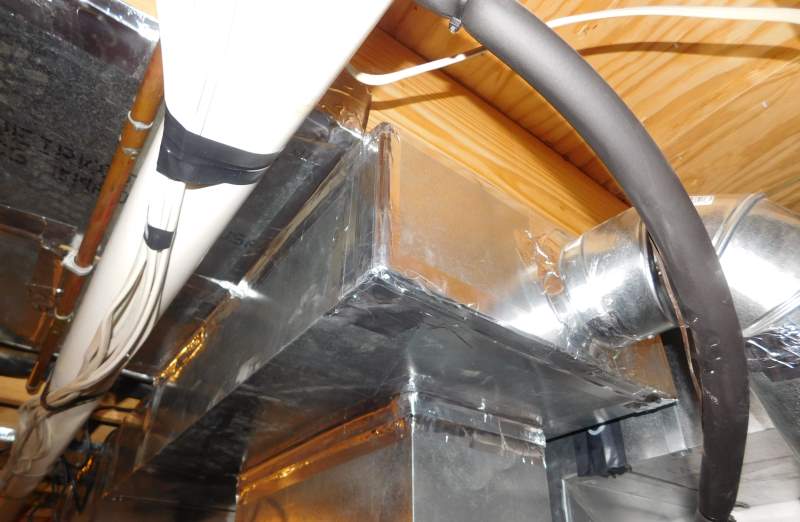
Since we had a baseline to work with from our test-in, we grabbed some foil tape and went to town sealing any hole we could find while the pressure fan was running. It was crazy to me how many holes I had missed when trying to tape things myself. There were several that were hidden along the top edge of the return line trunk. Having a pressure fan running made all the difference, as you could feel the air leaks blowing and hunt them down to seal them up. Starting with the tape also helps cut down on the wasted Aeroseal when it’s time to start pumping the sealant. Aeroseal is only able to fill a hole around 5/8″, so if you have big gaping holes in your system it won’t be able to do its job. In fact, I had a couple of bigger hidden holes in my return duct system that needed to be taped off. I actually had to cut out drywall to get to them (this was in a room that has yet to be finished by me, so I did not mind tearing into the ceiling). Here are some photos of the trunk line and return runs after taping everything, prior to the Aeroseal liquid. Note – If you have a spot with a huge hole, or a disconnected duct run you may have to tear open part of your house to fix it. I know it is not ideal, but it happens more than you think.
Once we had the duct system as tight as we could get it with tape, it was time to start pumping the duct-sealant into the jet stream. The fan box and motor pumps spray the liquid like an aerosol can into the ducts. As this began, the room we were in got pretty foggy. It was obvious that some of the liquid was escaping from the duct system into the room (finding leaks like it was supposed to). After a few minutes of this, the air started to clear up, and the leakage numbers began to drop on the system. It doesn’t take very long at all to actually seal things with the liquid, about 20-30 minutes, but the whole job took around 6 hours from start to finish.
POST AEROSEAL NUMBERS – HOW DID WE DO?
Here are the hard numbers post-duct sealing. As you can see, we were able to decrease the amount of air leakage in the system tremendously.

Ductwork Leakage
This is much better. After Aeroseal, my total duct leakage dropped to a whopping 7.9 sq inches.Here is what a hole of 80-sq inches looks like. This was my total duct air leakage prior to having the Aeroseal installed.
41.1 CFM
This is air leakage after the Aeroseal. This a lot better!
7.9 Sq In Hole
That amount of air is equivalent to a hole this big. Yeah, baby!
90.2% Reduction In Air Leakage!
DOES AEROSEAL WORK?
MICHELLE’S ROOM
The temperature difference in Michelle’s Room is gone. This change was instantaneous. That room now heats up evenly with the whole house. And most importantly, I no longer have to listen to my wife complain. Well, about that room, anyway. I owe the guys a beer for that one!
MY HVAC SYSTEM DOESN’T RUN AS MUCH
The whole house heats up faster. This may be all in my head, but I swear my furnace doesn’t run nearly as long as it used to. Luckily, I have a Nest thermostat and it logs all this info (how many times a day it runs and for how long). Once we get through the winter I’ll compare last year’s numbers to this year’s and we’ll be able to get some hard data.
HVAC SYSTEM LIFE
Just as your car only has so many miles in it before it gives up the ghost, your HVAC system only has so many hours of life to give. If you do everything you can to improve efficiency as a whole, it’s reasonable to believe your system will last longer. When the house heats up faster, and the furnace runs less time in doing so, you get more hours of life out of your unit.
SAVING MONEY
While longer lifespan on equipment is great, it’s also reasonable to believe my monthly bills will be less too. Again, it’s too soon to talk real numbers, but I’ll report when I have more info. Dollar dollar bills, ya’ll.
This is where I tell you all about how life-changing this process is, and how you simply can’t live without Aeroseal. But the truth is, you can. If you like paying for conditioned air that leaks into your attic, floats around in your walls, and doesn’t get where it should, do nothing at all. However, if you like the idea of being more comfortable in your home, having your HVAC equipment run less and last longer, and saving a couple of bucks every month on your utility bill, then you really should take a long, hard look at what Aeroseal and KY Energy Pro have to offer. I give it two thumbs up. It worked wonders in my house, and I have faith that it will work wonders in yours.
When all the fun is over, you will get a certificate to show you all these hard numbers, and how much they were able to tighten things up. I printed mine out and taped it to the ductwork. This is an impressive point to potential buyers of your home when it comes time to sell it. Take a peek at mine to see what they look like.
FAQ ABOUT AEROSEAL
I know lots of you will have questions about this product and the process. I created this section to try and answer those as much as possible. Some I will answer myself with my own personal experience, and some I copied from the Aeroseal FAQ page (mostly the technical jargon). I invite you to read their information as well. They also have a video that addresses common concerns here.


